

How To Install Swiftkey Keyboard
One of the all-time alternatives to Gboard is the SwiftKey keyboard. In addition to the Gboard features nowadays in SwiftKey, it provides other tools, such equally the clipboard and some more than.
You might not know this but very few keyboard apps have a clipboard functionality. Many people wouldn't know that such a feature exists in SwiftKey either. Non only that, you can even add new clips to the clipboard manually in Swiftkey. Cool, right?
Similarly, there are other such settings in SwiftKey that can be customized and we have handpicked the best of them for you.
Yous can tweak these settings as you lot wish, for the all-time SwiftKey experience.
Allow'south beginning our journey on the road to becoming a Swiftkey Pro by learning to open the SwiftKey settings. Here's how to exercise that.
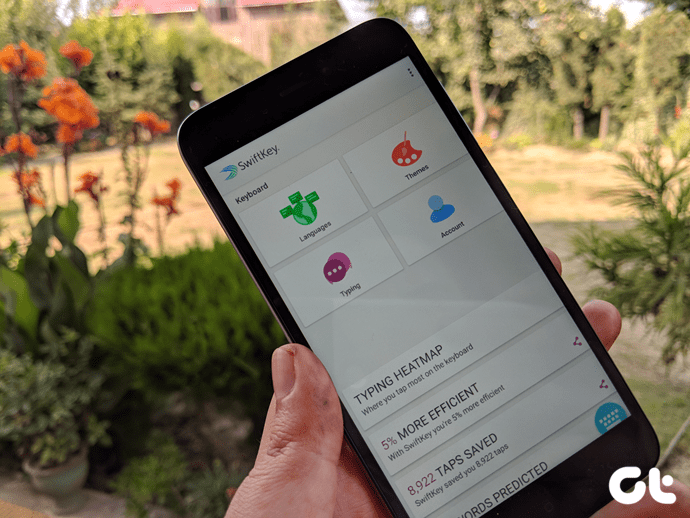
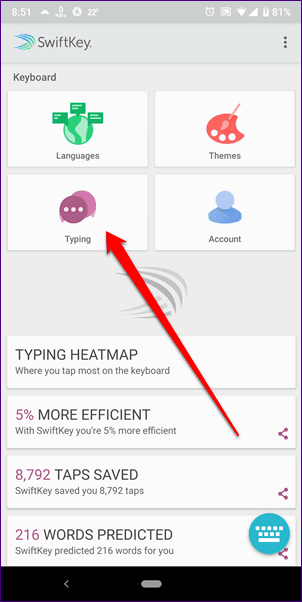
Access SwiftKey Settings
There are 2 ways to open up the SwiftKey settings.
Method ane: From the Keyboard
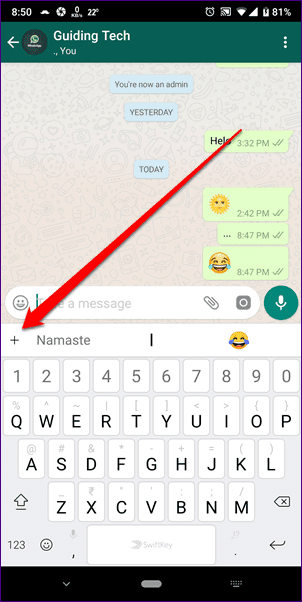
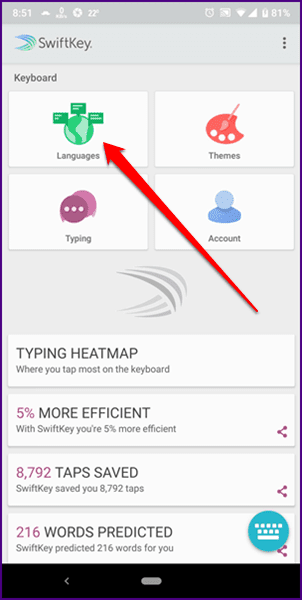
Step 1: Open the SwiftKey keyboard in whatever app. Then tap the + icon nowadays at the top-left corner. From the options that appear, tap on the Settings icon.
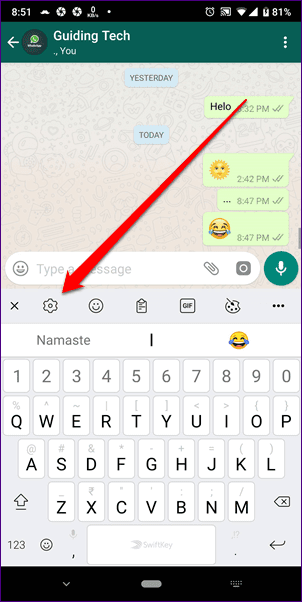
Step 2: You lot volition get a preview of the settings. Tap the Settings icon at the peak-right corner to view full settings.

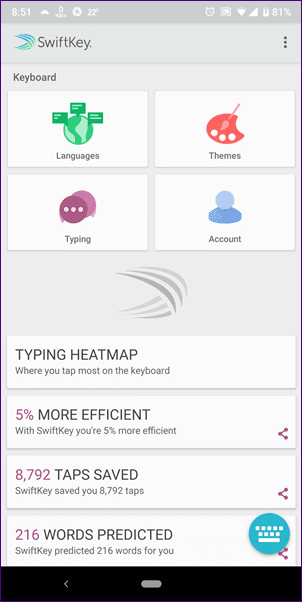
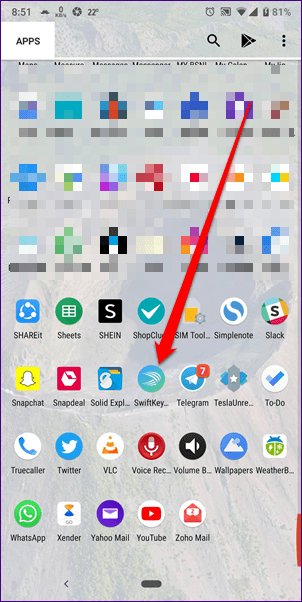
Method two: From Apps
Since the SwiftKey icon is nowadays under the apps, you can tap the icon there and you lot will exist taken to its settings.
Allow'southward dive into the settings at present.
1. Change layout
Layout plays a very important office in the popularity of a keyboard. If the keys aren't bundled in a way that we like, i would start looking for alternatives. Just y'all don't have to do that in case of SwiftKey every bit it offers multiple layouts. You can choose from AZERTY, QWERTY, QWERTZ, etc.
To change the layout, follow the steps:
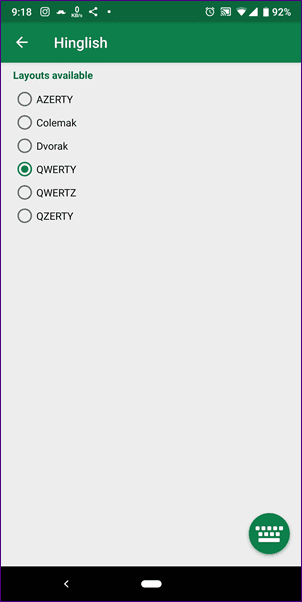
Footstep 1: Open the SwiftKey settings and tap on Languages. Under Languages, add a new linguistic communication or tap on the existing language for which you want to change the layout.

Step 2: Select the layout of your choice from the available layouts.
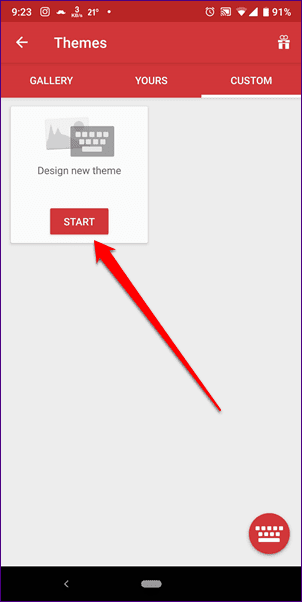
2. Add Background Prototype
No other app can compete with the number of themes offered by SwiftKey. But if you still want more, you can add your own custom image in the background of the keyboard.
Here's what y'all demand to exercise.
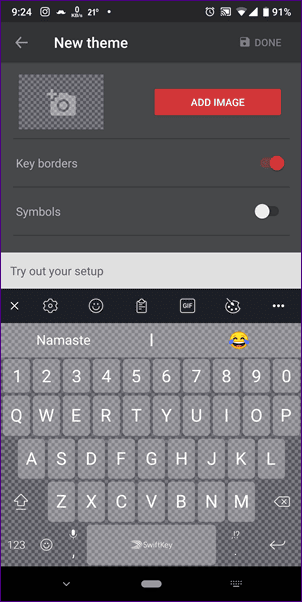
Stride one: Open the SwiftKey settings and tap on Themes. Then tap on the Custom tab.

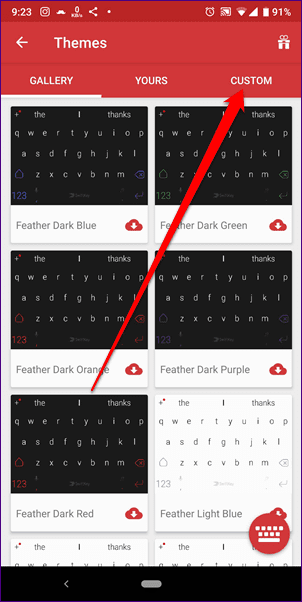
Pace 2: Under the Custom tab, striking Start, and on the side by side screen, select the groundwork image and customize other keyboard settings.
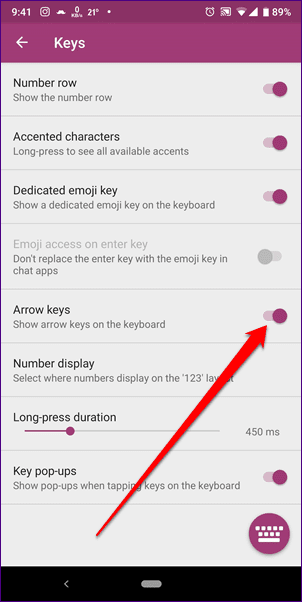
three. Pointer Keys
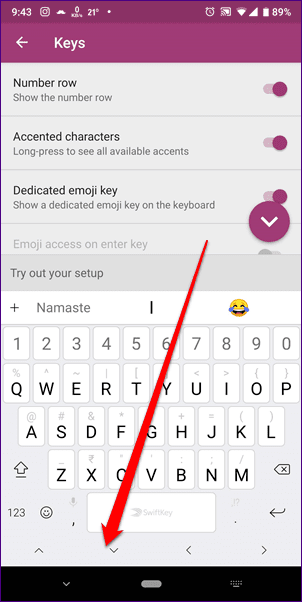
Very few keyboard apps come with dedicated arrow keys. These keys help to navigate through the text easily. In one case enabled in SwiftKey, you will observe them at the bottom of the keyboard.
To enable them, do this:
Step 1: Get to the SwiftKey settings followed by Typing. Under Typing, go to Keys.


Stride 2: Enable Arrow keys.
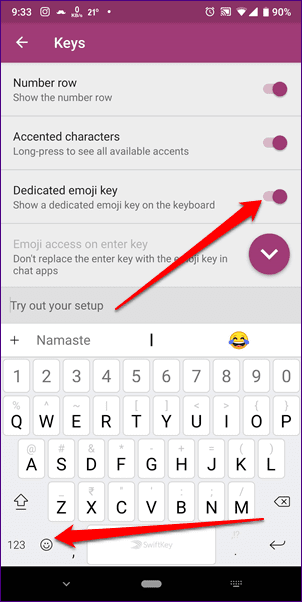
4. Defended Emoji Fundamental
Who doesn't like emojis? These days they are pretty much the essence of any texting, and hence, it's important that they should be easily accessible via a dedicated emoji key. Thankfully, you have the ability to enable or disable the dedicated emoji central in SwiftKey.
Hither are the steps:
Pace one: Go to the SwiftKey settings. Tap on Typing followed by Keys.


Footstep 2: Plough the toggle on for the Defended emoji key option. Once you lot practise that, the emoji key will be placed on the left side of the space bar.
Annotation
v. Emoji Predictions
Another setting that makes it easy to add emojis is the emoji prediction. While typing, you will go emoji suggestions for the words added in the text.
To actuate this, follow the steps:
Step i: Launch the SwiftKey settings and tap on Typing. Then select Typing & autocorrect.

Step two: On the next screen, enable Emoji predictions. If yous are not an emoji fan, you can turn off the suggestions hither.

half-dozen. Typing Shortcuts
Like to Gboard, SwiftKey also offers typing shortcuts. When typing, you can insert a menses by double tapping the spacebar. Similarly, the words can be capitalized automatically afterward punctuations.
To enable these settings, go to Typing & autocorrect in the SwiftKey settings and enable Quick menses and Car capitalize.

7. Change Keyboard Sound
Although I personally dislike the typing audio on my device, if you are the kind of person who likes to keep it on, SwiftKey offers multiple sounds.
To change the SwiftKey sound, follow the steps:
Step 1: Go to the SwiftKey settings and tap on Typing. And so select Sound & vibration.
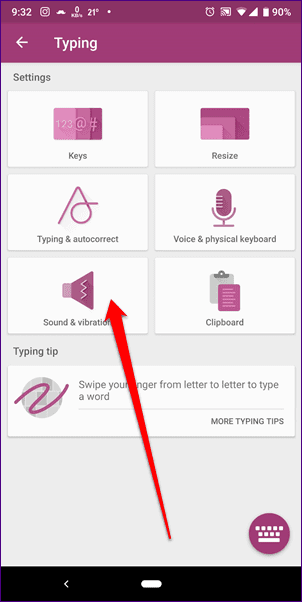
Step 2: Tap on Keypress sound contour and select the sound of your pick. To test the sound, tap the keyboard preview icon at the lesser-right corner.
Note


8. Add New Item to Clipboard
While the text that y'all re-create will automatically evidence in the clipboard, if yous desire you tin create manual clipboard entries with their shortcut. You tin can use this feature as a text-replacement tool.
To add new entries in the clipboard, do this:
Pace ane: In the SwiftKey settings, tap on Typing followed past Clipboard.

Step ii: Nether Clipboard, tap on Add a new clip and enter the clip content and its shortcut.
To use it, simply open the clipboard and paste information technology or type the shortcut.


Get Going!
We hope you liked the SwiftKey settings post. Now it's time to open the settings and tweak it equally per your need. Best of luck!

Source: https://www.guidingtech.com/best-swiftkey-settings/
Posted by: rossgother1977.blogspot.com
0 Response to "How To Install Swiftkey Keyboard"
Post a Comment